
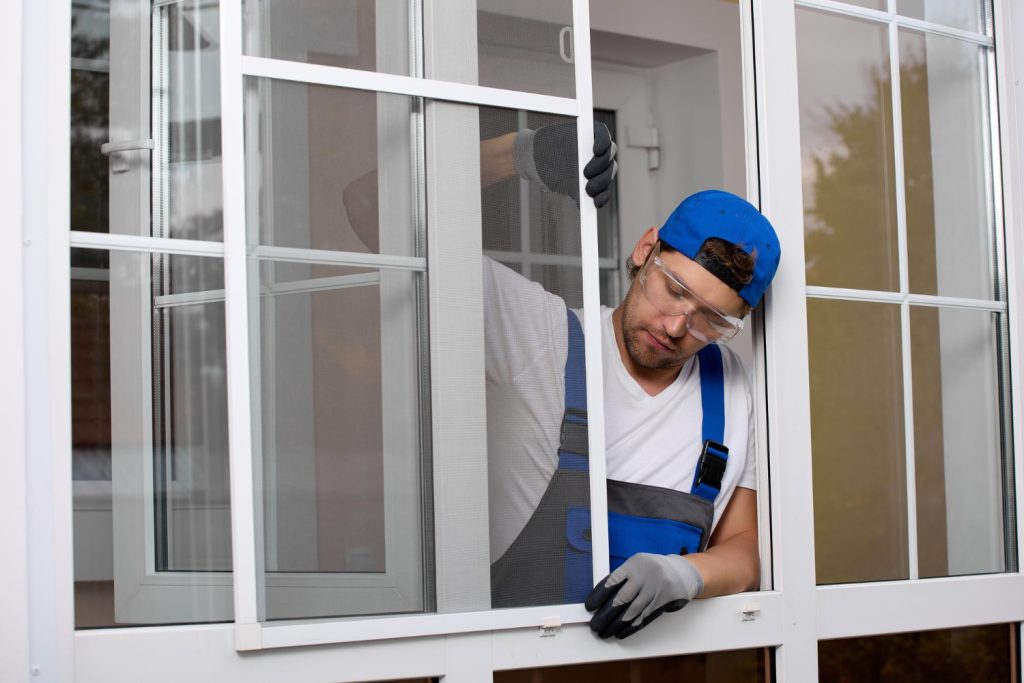
Replacing windows or exterior doors is a major home improvement project, and knowing what happens before installation day can make the process much easier. Homeowners often have questions about measurements, ordering time, preparation, removal, installation, finishing, and cleanup. If you are planning window and door installation Markham, understanding the full timeline helps you organize your home, set realistic expectations, and compare contractors more confidently.
Northridge Windows & Doors helps homeowners move through every stage of window and door installation Markham with a clear plan. The process begins well before installers arrive at your property. Product selection, accurate measurements, manufacturing, scheduling, preparation, and installation all contribute to the final result. Whether you are replacing Casement Windows, Awning Windows, Bay And Bow Windows, Entry Doors, or Patio Doors, this guide explains what to expect from consultation through final inspection.
How Long Does Window And Door Installation Take?
The actual installation portion of window and door installation Markham may take anywhere from part of a day to several days, depending on the number and type of openings being replaced. A straightforward project involving a few standard windows can often progress quickly, while a whole-home replacement requires more time. Large Bay And Bow Windows, custom Entry Doors, Patio Doors, damaged openings, second-storey access, and complex finishing can all increase the amount of work required on site. Weather may also affect certain exterior finishing tasks.
The overall project timeline is longer because windows and doors usually need to be measured, ordered, manufactured, delivered, and scheduled before installation begins. Custom colours, specialty glass, unique dimensions, decorative sidelites, or unusual configurations may require additional production time. When discussing window and door installation Markham, homeowners should ask about both the expected manufacturing timeline and the estimated on-site installation schedule so they understand the complete process rather than focusing only on installation day.
Why Every Installation Timeline Is Different
Every property has different opening sizes, frame conditions, product configurations, access challenges, and finishing requirements. The most reliable timeline for window and door installation Markham comes after professional measurements and product selections have been finalized, since those details determine manufacturing requirements and how much work installers need to complete at the home.
Step 1: Initial Consultation And Home Assessment
The first step in window and door installation Markham is usually a consultation to discuss the homeowner’s concerns and project goals. You may be dealing with drafts, condensation, difficult operation, outdated styles, broken hardware, fading finishes, or inefficient glass. A professional can review the existing openings and discuss which windows or doors need replacement, whether some units can remain, and which styles are suitable for each room or entrance.
This stage is also where homeowners can compare product choices. Casement Windows may be suitable where strong sealing and ventilation are priorities, while Awning Windows can work well in bathrooms, basements, and smaller openings. Bay And Bow Windows can create a larger architectural feature, while Entry Doors and Patio Doors require decisions involving glass, security, hardware, and exterior design. A successful window and door installation Markham begins with choosing products based on how each opening is actually used.
What To Discuss During Your Consultation
Tell the installer about rooms that feel cold, areas with noticeable drafts, moisture concerns, windows that are difficult to operate, exterior noise, and doors that no longer close properly. Sharing these details helps ensure that window and door installation Markham addresses actual comfort and performance concerns instead of being based only on appearance.
Step 2: Accurate Measurements And Product Selection
Accurate measurements are essential because replacement windows and doors need to fit their openings properly. Measurements should account for dimensions, frame condition, installation method, wall construction, trim, and any unusual features around the opening. Errors at this stage can create delays or installation problems later, which is why professional measuring is one of the most important parts of window and door installation Markham.
Once measurements are confirmed, homeowners finalize product details such as window style, frame colour, glass package, grille pattern, hardware, door design, and interior or exterior finishes. For Entry Doors, this may also involve selecting sidelites, decorative glass, locks, and handle sets. Patio Doors may require decisions about screens, frame colours, glass, and operating configuration. These details should be confirmed before products enter manufacturing so your window and door installation Markham proceeds smoothly when the order arrives.
Why Final Measurements Matter
Replacement units are often manufactured for specific openings, so small measurement errors can affect fit, sealing, trim, and operation. Professional final measurements help reduce installation-day surprises and allow the installer to plan how each opening will be prepared.
Step 3: Ordering And Manufacturing Your Windows And Doors
After the design and measurements are approved, the windows and doors are ordered for manufacturing. The production timeline varies by manufacturer, season, product complexity, colour, glass, and customization. Standard configurations may be available sooner than highly customized Bay And Bow Windows or Entry Doors with decorative glass and sidelites. Homeowners should ask for a realistic estimated delivery range rather than assuming every product will follow the same schedule.
This waiting period is a good opportunity to prepare for window and door installation Markham. Homeowners can move furniture, remove delicate decorations, arrange access to rooms, plan for pets, and confirm parking or driveway requirements with the installation team. It is generally better to make these preparations gradually rather than waiting until the morning installers arrive.
Custom Products May Require More Lead Time
Special colours, unusual dimensions, upgraded glass, decorative door inserts, custom hardware, and complex configurations can require additional manufacturing time. This does not necessarily indicate a delay. It may simply reflect the production requirements of a customized window and door installation Markham project.
Step 4: Preparing Your Home For Installation Day
Preparing your home helps installers work efficiently and protects your belongings. Before window and door installation Markham begins, move furniture, lamps, electronics, plants, and decorative items away from the openings. Curtains, blinds, and other window coverings may need to be removed depending on the installation scope. Clear exterior areas as well, especially around ground-floor windows, Entry Doors, and Patio Doors.
Pets and young children should be kept safely away from active work areas because installers will be carrying tools, glass, frames, and old materials through the property. Homeowners should also discuss alarm sensors attached to windows or doors before work begins. When the work areas are accessible and organized, window and door installation Markham can proceed with fewer interruptions and a lower risk of accidental damage.
How Much Space Should You Clear?
Ask your installer how much working room is required because the amount may vary by product. As a general rule, provide enough clear space for installers to safely remove the old unit, prepare the opening, move the replacement product into position, and complete interior finishing.
Quick Installation Day Preparation Checklist
Installation day can feel busy, particularly if several windows and doors are being replaced. Preparing the evening before can make the experience much more manageable. Confirm when the crew is expected, make sure work areas are accessible, and remove personal items that could interfere with the installation. Your contractor may provide additional instructions specific to your project.
A good preparation checklist also reduces the chance that installers need to stop repeatedly while homeowners move belongings or provide access. Before window and door installation Markham begins, review the following items and confirm any special requirements with Northridge Windows & Doors.
- Move furniture away from windows and doors
- Remove fragile decorations and wall items near work areas
- Take down curtains or blinds if requested
- Clear patios, decks, walkways, and exterior work zones
- Keep children and pets away from installation areas
- Inform installers about security system sensors
- Make driveway or parking access available if necessary
- Protect valuable or sensitive electronics from dust
- Ask how old windows and doors will be disposed of
- Confirm which interior and exterior finishing is included
- Keep a clear pathway between entrances and work areas
- Review the final installation schedule with the project team
Step 5: Removing The Existing Windows And Doors
Once installation begins, the crew carefully removes the existing windows or doors. The exact method depends on whether the project uses an insert installation or a complete tear-out. Natural Resources Canada explains that an insert places a replacement product within an existing frame and should only be considered when that frame has not deteriorated and is properly sealed and insulated. A complete tear-out removes the old product and its frame, providing greater access to the rough opening.
Removal during window and door installation Markham should be controlled rather than rushed. Once the old unit is out, installers can examine the opening for conditions that were not visible beforehand, such as deterioration, old insulation gaps, water staining, or damaged materials. If unexpected conditions are discovered, they should be discussed before the new unit is permanently installed.
Insert Installation Versus Complete Tear-Out
Insert installation can reduce disruption when an existing frame remains suitable, while complete tear-out provides access to the full rough opening and allows a new insulated seal to be created around the replacement unit. The correct method for window and door installation Markham depends on the condition of the existing assembly rather than price alone.
Step 6: Preparing And Inspecting The Rough Opening
Preparation of the opening is one of the most important stages of window and door installation Markham. The installer should make sure the area is suitable for the new product and address obvious issues that could interfere with fit, sealing, or water management. The opening must allow the unit to be positioned correctly without forcing it into an unsuitable space.
Natural Resources Canada states that installation should provide an airtight, insulated seal and that a window or door should retain its intended shape while remaining level and square. Exterior finishing and flashing should also direct water away from the unit and frame. These principles matter because even a high-performance product may develop drafts, operating problems, or moisture issues when installation is poor.
Hidden Problems Can Affect The Schedule
Rot, moisture damage, deteriorated framing, masonry issues, or previous installation mistakes may not become visible until the old window or door is removed. When these conditions occur, properly correcting them can add time to window and door installation Markham, but addressing the underlying issue is usually better than covering it with a new product.
Step 7: Installing, Levelling And Securing The New Products
The new window or door is positioned in the prepared opening and adjusted so it sits correctly. Windows need to remain square so sashes operate properly and locks align. Exterior doors must also be carefully positioned so the slab closes smoothly and makes consistent contact with weatherstripping. Patio Doors require accurate track and panel alignment to ensure smooth operation.
This stage of window and door installation Markham also includes securing the unit according to product and manufacturer requirements. The installer checks operation as the product is positioned rather than waiting until everything is finished. Small alignment problems are much easier to correct during installation than after interior trim and exterior sealing have been completed.
Operation Should Be Checked Before Finishing
Casement Windows should crank smoothly, Awning Windows should open and close correctly, door locks should align, and Patio Doors should slide without excessive effort. Testing products during window and door installation Markham helps identify adjustments before the finishing stage.
Step 8: Insulation, Air Sealing And Weather Protection
The space between the replacement unit and surrounding opening must be properly insulated and sealed. This step is critical because gaps around an efficient product can undermine comfort. Natural Resources Canada warns that poorly installed windows or doors can contribute to cold drafts, condensation, and water leakage. It specifically recommends professional installation and an airtight, insulated seal.
Exterior sealing is equally important during window and door installation Markham. Flashing, sealants, and other appropriate materials help prevent water from entering around the opening. The exact products and techniques depend on the wall system and manufacturer requirements. Correct air and water management supports the performance of the window or door through Markham’s changing seasons.
Why Installation Matters As Much As Energy Ratings
Natural Resources Canada states that ENERGY STAR certified windows are about 20 percent more energy efficient than average windows and certified doors about 15 percent more efficient than average doors. However, those benefits depend on installation that does not introduce drafts or water problems.
Step 9: Interior And Exterior Finishing
After the units are installed and sealed, finishing work begins. Interior finishing can include trim, casing, extensions, caulking, and other details depending on the contract. Exterior finishing may include capping, trim, flashing details, or sealants. Homeowners should understand what finishing is included before window and door installation Markham begins because different quotes may include very different scopes.
Good finishing should look clean while supporting the performance of the installation. Exterior finishes need to help manage water, while interior finishes should create a tidy transition between the new product and surrounding wall. Colour, trim proportions, and caulking lines can significantly influence the final appearance, especially around prominent Entry Doors or Bay And Bow Windows.
Clarify Finishing Before Signing The Contract
Ask whether existing trim will be reused or replaced, whether painting is included, how exterior capping will be handled, and what repairs are included if the surrounding opening requires additional work. Clear expectations reduce confusion after window and door installation Markham begins.
Step 10: Cleanup And Final Inspection
A professional project should end with a thorough cleanup. Old windows, doors, frames, packaging, installation debris, and other agreed materials should be removed according to the scope of the contract. Work areas should be left usable, and homeowners should have an opportunity to examine the completed installation. Cleanup is part of the overall customer experience and should be discussed before work starts.
During the final inspection of window and door installation Markham, operate each new window and door. Test locks, handles, cranks, screens, Patio Door rollers, and Entry Door hardware. Examine interior and exterior finishing and ask questions about maintenance. Northridge Windows & Doors believes homeowners should understand how their new products operate and what simple maintenance can help keep them performing properly.
What To Check Before The Crew Leaves
Open, close, and lock each operable product, inspect visible finishing, and confirm that screens and hardware are working correctly. If anything requires adjustment, identifying it during the final walkthrough makes it easier to address promptly.
Two Canadian Government Resources For Homeowners
Natural Resources Canada’s Keeping The Heat In guide provides detailed information about upgrading windows and exterior doors. It discusses repair, replacement, insert installation, complete tear-out installation, air sealing, insulation, flashing, and professional installation. This makes it a useful educational resource for homeowners preparing for window and door installation Markham.
Natural Resources Canada’s ENERGY STAR resource for windows, doors, and skylights provides information about certified energy-efficient products and installation. It also warns that poor installation may cause condensation, drafts, or water leakage. Reviewing both resources can help homeowners understand why product quality and installation quality should be considered together when planning window and door installation Markham.
Why Choose Northridge Windows & Doors
Northridge Windows & Doors helps homeowners approach window and door installation Markham with a clear process from consultation through final inspection. We can help you compare Casement Windows, Awning Windows, Bay And Bow Windows, Entry Doors, Patio Doors, Fiberglass Doors, and Steel Doors according to your home’s comfort needs, architectural style, security priorities, and budget. Our goal is to recommend products that make sense for each opening rather than treating every home the same way.
Installation receives the same attention as product selection. Accurate measurements, opening preparation, insulation, sealing, alignment, hardware adjustments, finishing, and cleanup all contribute to the final result. Whether you are replacing a few problem openings or completing a whole-home window and door installation Markham project, Northridge Windows & Doors focuses on helping the installation run smoothly while delivering dependable long-term performance.
Know The Process Before Installation Day
Window and door replacement involves much more than removing an old unit and putting a new one in its place. Consultation, measurements, manufacturing, preparation, removal, opening inspection, installation, insulation, sealing, finishing, cleanup, and final adjustments all contribute to the project. Understanding these stages makes window and door installation Markham easier to plan and helps homeowners recognize what should be included in a professional installation.
If your existing windows or doors are drafty, difficult to operate, damaged, inefficient, or simply outdated, Northridge Windows & Doors can help you plan the next step. From Casement Windows and Awning Windows to Patio Doors and Entry Doors, our team can create a window and door installation Markham plan based on your home’s actual needs. Contact Northridge Windows & Doors to discuss your project, product options, installation requirements, and expected timeline.
Frequently Asked Questions
Homeowners naturally have questions about how long installation takes, whether they need to leave the house, how much preparation is required, and what happens if unexpected damage is discovered. The exact answers vary according to project size, product type, opening condition, and installation method, but knowing the general process makes planning easier.
These seven questions cover common concerns about window and door installation Markham. Your contractor should also provide project-specific instructions before installation day so you understand access requirements, preparation, estimated duration, finishing, cleanup, and any special considerations for your property.
1. How Long Does Window And Door Installation Markham Usually Take?
The on-site portion of window and door installation Markham may take part of a day or several days depending on the number of units, product types, opening conditions, accessibility, and finishing requirements.
2. How Should I Prepare For Window And Door Installation Markham?
Move furniture and fragile items away from openings, clear exterior work areas, secure pets and children, and remove window coverings if requested by your installer.
3. Can I Stay Home During Window And Door Installation Markham?
In many cases, yes. However, individual rooms may be temporarily unavailable while installers work, and homeowners should stay clear of active work areas for safety.
4. What Happens If Damage Is Found During Window And Door Installation Markham?
If hidden deterioration or moisture damage is discovered after removal, the installer should explain the issue and discuss what corrective work is needed before permanently installing the new unit.
5. Is Full-Frame Replacement Always Required For Window And Door Installation Markham?
No. Insert installation may be suitable when an existing frame remains structurally sound, properly sealed, and insulated. Complete tear-out replacement is often preferred when the existing frame is deteriorated or problematic.
6. Does Window And Door Installation Markham Include Cleanup?
Cleanup and disposal should be clearly identified in the project agreement. A professional installation scope commonly includes removing agreed installation debris and leaving work areas reasonably clean.
7. Why Choose Northridge Windows & Doors For Window And Door Installation Markham?
Northridge Windows & Doors helps homeowners with product selection, measurements, preparation, professional fitting, insulation, sealing, finishing, adjustments, and final inspection for a complete installation experience.

